
For those of us who do heaps of holiday baking, there’s a simple way of incorporating the hard work into holiday décor! A holiday cookie tree is a showstopper and perfect gift for family gatherings (let’s say for next year), or a fun activity to get the kids involved. Acting like an edible jenga, one recipe is enough to last you through the holidays!
With all our traditional family recipes of sablés, biscottis and orange sugar cookies, introducing a nutty and herbal cookie seemed to be essential for this year! Introducing matcha powder into a tahini cookie recipe was a perfect fit to play on subtle almond and delicate bitterness and to introduce the perfect green hue for a cookie tree.
I worked with this recipe and made slight adjustments, and will surely modify it further in the future but I urge you to try this one first!
Matcha Tahini Cookies
Ingredients:
- 1/4 cup tahini
- 1 cup butter softened
- 1 1/2 cup sugar
- 2 eggs
- 1 teaspoons vanilla
- 1/2 teaspoon almond extract
- 3 cups flour
- 2- 2 1/2 teaspoon culinary grade matcha powder
- 1/2 teaspoon baking powder
- 1/2 teaspoon baking soda
- 3/4 teaspoon salt
Method:
- Using a stand mixer, cream together tahini, butter and sugar until light and airy and lighter and colour (approx. 5-8 min).
- Add eggs, extracts and matcha powder with an electric mixer or food processor until uniform,
- In a medium bowl, whisk together flour, baking soda, baking powder, baking soda, and salt.
- Add dry ingredients to wet and mix until dough forms. Roll into two discs, wrap in plastic wrap, and refrigerate for at least 2 hours, or until firm to the touch.
- Preheat oven to 375F. Prepare baking sheet by lining with parchment paper.
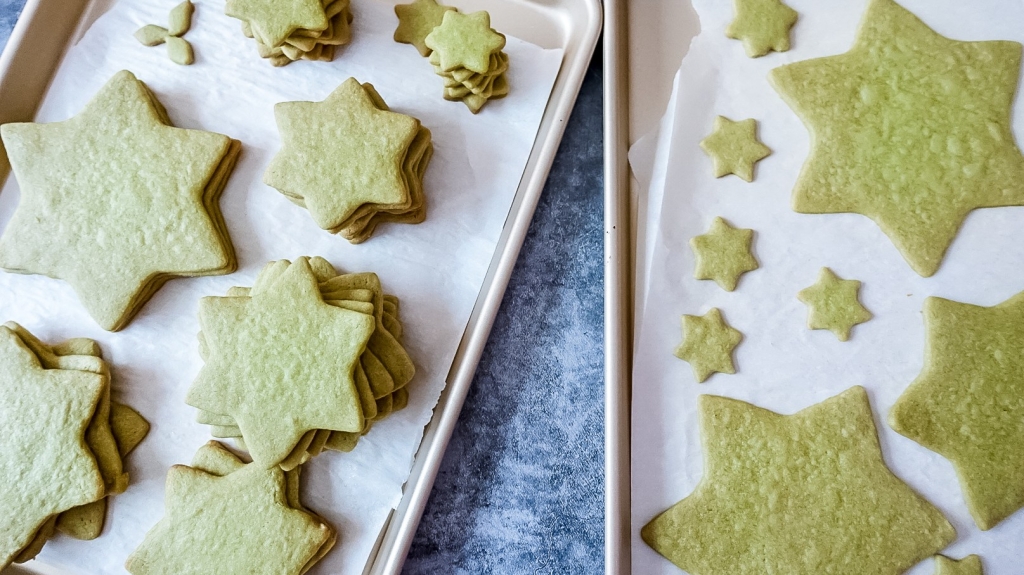
- Remove dough from fridge and roll out to about 1/4-inch thickness between 2 sheets of parchment paper or on a floured surface.
- Cut out cookies using star-shaped cutter in varied sizes and place on a baking sheet.
- Bake for 8-10 minutes or until the centres have set and the edges are lightly browned.
- Cool completely and stack as high as you’d like.
Stack delicately, using your choice of buttercream or spread to “glue” the ornament together and why not use one cranberry to top this festive treat! Decorate with a dusting of powdered sugar and place as centrepiece.
Enjoy!


Leave a comment